How to Make Sourdough Bread Starter: Your Expert Guide
August 24, 2026 16 min read 3,149 words
Transform simple flour and water into a vibrant, bubbling sourdough starter that will elevate your homemade bread.
Start Your Sourdough Journey
Understanding the Magic: What is a Sourdough Starter?
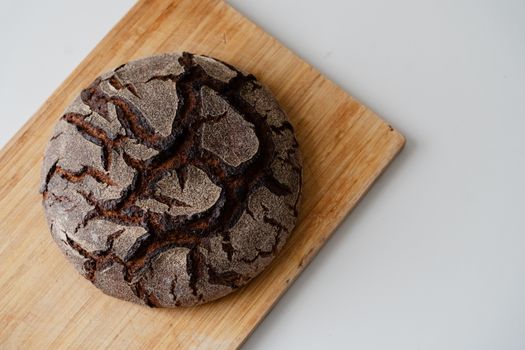 Photo: Anh Nguyen / Pexels
Before diving into the practical steps of how to make sourdough bread starter, it’s crucial to understand what it actually is. At its heart, a sourdough starter is a living, breathing ecosystem of wild yeasts and lactic acid bacteria (LABs) that thrive on a simple diet of flour and water. Unlike commercial yeast, which is a single strain of yeast bred for specific leavening power, a sourdough starter is a complex microbial community. This community is what gives sourdough bread its distinctive tangy flavor, chewy texture, and often improved digestibility.
The wild yeasts, present naturally in the air, on the surface of grains, and even on your hands, are responsible for producing carbon dioxide gas, which makes the bread rise. The lactic acid bacteria, on the other hand, produce lactic and acetic acids. These acids contribute significantly to the characteristic sour flavor profile of sourdough and also help preserve the bread. The symbiotic relationship between these yeasts and bacteria is what makes a sourdough starter so powerful and unique. It's a testament to natural fermentation, a process that has been used for millennia to create delicious and wholesome bread.
Creating a sourdough starter from scratch is an act of patience and observation. You're not just mixing ingredients; you're cultivating life. The initial days involve creating an environment where these wild microorganisms can establish themselves. As you feed your starter, you're essentially selecting for the most robust and beneficial strains, encouraging them to multiply and become strong enough to leaven bread. This process can be incredibly rewarding, connecting you to ancient baking traditions and providing a profound sense of accomplishment when you bake your first loaf with your very own, home-grown starter. Understanding this fundamental biology demystifies the process and helps you troubleshoot potential issues, making your journey to a vibrant starter much smoother. It's a journey into the fascinating world of microbiology, right in your kitchen. This foundational knowledge is key to successfully maintaining your starter long-term and understanding its behavior, whether it's sluggish or vigorously active. The quality of your ingredients, especially the flour, plays a significant role in fostering a healthy microbial community.
Choosing the right flour for your starter can make a world of difference, as different flours offer varying nutrient profiles that can influence the yeast and bacteria. Think of your starter as a tiny, dynamic farm, where you're providing the perfect conditions for your microscopic livestock to flourish and produce their valuable byproducts – carbon dioxide and organic acids. This living culture is not just an ingredient; it's the soul of your sourdough baking. The more you understand its needs and nuances, the better baker you will become, capable of adapting to its subtle changes and ensuring its consistent vitality for countless loaves to come. It’s a craft that evolves with practice and observation, turning flour and water into the most magical leavening agent.
Gathering Your Essentials: Ingredients and Equipment for Your Starter
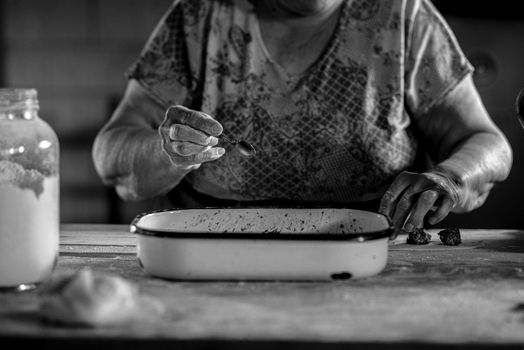 Photo: Natalia Olivera / Pexels
Embarking on the journey of how to make sourdough bread starter requires very few, yet specific, ingredients and tools. The beauty of sourdough lies in its simplicity, demanding only flour and water. However, the type and quality of these basic components can significantly impact your starter's success and vigor. Let's break down what you'll need to gather before you begin cultivating your culinary companion.
**Flour:** The most critical ingredient is flour. While you can technically start with all-purpose flour, many experienced bakers recommend using unbleached all-purpose flour, whole wheat flour, or even rye flour for the initial stages. Whole grain flours, especially rye, are often richer in nutrients and natural microorganisms, providing a more fertile ground for wild yeasts to take hold and proliferate. The bran and germ in whole grains contain more of the beneficial microbes and enzymes that kickstart fermentation. If starting with whole wheat or rye, you can transition to unbleached all-purpose flour for subsequent feedings once your starter is established. Always opt for unbleached flour, as the bleaching process can inhibit microbial growth. Avoid self-rising flour at all costs, as it contains leavening agents that will interfere with the natural fermentation process.
**Water:** The second essential ingredient is water. Tap water is generally fine, but if your tap water is heavily chlorinated, it can inhibit the growth of your starter's microbial community. Chlorine is a disinfectant designed to kill microorganisms, which is the exact opposite of what you want for your starter. To mitigate this, you can leave tap water out in an open container for 24 hours to allow the chlorine to dissipate, or use filtered water. Avoid distilled water, as it lacks the minerals that yeasts and bacteria need to thrive. Room temperature water is ideal for feeding, as extreme temperatures can shock the delicate microbial balance.
**Equipment:** You'll also need a few basic pieces of equipment. A clean, clear jar or container with a wide mouth is essential. Glass jars, like canning jars or large mason jars, are perfect as they allow you to observe the activity (bubbles, rise) within your starter. The container should be large enough to accommodate the starter as it grows, typically at least a quart (1 liter) in size. Avoid containers with narrow openings that make feeding and mixing difficult. You'll also need a lid, but not an airtight one, especially in the early stages. A loose-fitting lid, a piece of plastic wrap, or a clean kitchen towel secured with a rubber band will allow gases to escape while protecting your starter from contaminants. A kitchen scale is highly recommended for accurate measurements. Measuring by weight (grams) rather than volume (cups) ensures consistency, which is crucial for maintaining a healthy starter. Finally, a rubber spatula or wooden spoon for mixing will be helpful. Ensure all your equipment is clean to prevent unwanted mold or bacteria from taking root. With these simple provisions, you're well-prepared to begin the exciting process of cultivating your very own sourdough starter.
The Day-by-Day Journey: Your Sourdough Starter Schedule
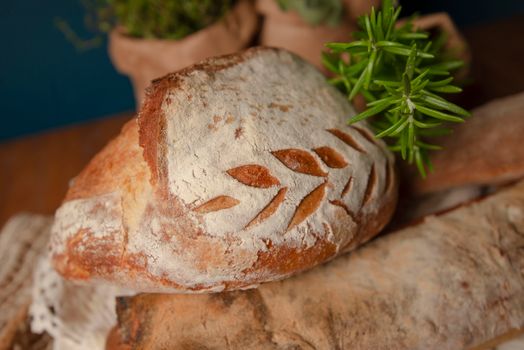 Photo: Natalia Olivera / Pexels
Successfully learning how to make sourdough bread starter is a journey that unfolds over approximately 7-14 days, requiring daily attention and observation. This schedule is a general guide; your starter's progress may vary based on environmental factors like room temperature and flour type. Patience is your most valuable tool.
**Day 1: The Beginning**
In a clean, clear jar, combine 60g (approximately ½ cup) unbleached all-purpose, whole wheat, or rye flour with 60g (approximately ¼ cup) lukewarm water. Mix thoroughly until no dry spots remain and it forms a thick paste. Scrape down the sides of the jar. Cover loosely with a lid, plastic wrap, or a clean kitchen towel. Place it in a warm spot (ideally 70-75°F or 21-24°C) away from direct sunlight. Do nothing else until Day 2.
**Day 2: First Signs of Life**
You might not see much activity yet, or perhaps a few small bubbles. This is normal. No feeding today. Just observe. The microbes are beginning to wake up and establish themselves. Maintain the warm environment. Resist the urge to peek too often or disturb it unnecessarily.
Understanding the optimal temperature for fermentation is crucial for encouraging healthy microbial growth.
**Day 3: The First Feed**
By now, you might see more bubbles, and perhaps a slight sour or yeasty smell. This is a good sign! Discard about half of your starter (approximately 60g). To the remaining 60g of starter, add 60g fresh flour and 60g lukewarm water. Mix well, cover loosely, and return to its warm spot. Discarding starter is important; it reduces the volume, ensuring the remaining microbes have ample fresh food to multiply vigorously.
**Days 4-6: The Rise and Fall**
Continue the feeding routine: discard half, add 60g flour, 60g water. You should start seeing more consistent activity. After feeding, your starter should rise, sometimes doubling in size, and then slowly fall back down over several hours. You'll observe many bubbles and a pleasant, tangy aroma (like yogurt or ripe fruit). If you see mold (fuzzy, colored spots), unfortunately, you'll need to discard and start over. A strong, active rise and fall within 6-12 hours after feeding indicates a healthy, developing starter. If it's sluggish, ensure your room temperature is consistently warm.
**Day 7-14: Maturity and Readiness**
By this point, your starter should be consistently doubling in size within 4-8 hours after feeding and have a robust, tangy, yeasty smell. It should be full of bubbles. To test if it's ready to bake with, perform the 'float test': drop a small spoonful of starter into a glass of water. If it floats, it's ready! If it sinks, it needs more time and strength. Continue feeding daily (discarding half, adding equal parts flour and water by weight) until it consistently passes the float test. Once mature, you can transition to a maintenance schedule, either keeping it on the counter with daily feedings or refrigerating it for less frequent use, feeding it once a week. This detailed, day-by-day approach ensures you nurture a robust and reliable sourdough starter, ready to leaven your delicious homemade breads.
Troubleshooting Common Sourdough Starter Issues & Maintenance
Photo: Natalia Olivera / Pexels
Learning how to make sourdough bread starter is often straightforward, but like any living culture, it can encounter a few bumps along the road. Don't be discouraged if your starter isn't behaving exactly as expected; troubleshooting is part of the sourdough journey. Understanding common issues and proper maintenance will ensure your starter remains vibrant and ready for baking.
**Common Issues and Solutions:**
* **No Activity/Sluggishness:** If your starter isn't bubbling or rising, the most common culprits are cold temperatures or insufficient feeding. Try moving your starter to a warmer spot (75-80°F is ideal for vigorous activity). Ensure you are consistently feeding it every 24 hours, or even every 12 hours if it's very sluggish. Using whole wheat or rye flour for a few feedings can also give it a boost due to their higher nutrient content. Make sure your water isn't chlorinated.
* **Hooch (Dark Liquid):** Hooch is a dark, watery layer that forms on top of your starter. It’s a sign that your starter is hungry and has consumed all its food. A small amount of clear hooch is generally harmless; you can stir it back in or pour it off before feeding. Darker hooch (brown or black) indicates severe hunger and a very weak starter. In this case, pour off the hooch, discard half the starter, and feed it twice a day for a few days to revive it. It's the alcohol byproduct of fermentation.
* **Foul Smell:** While a healthy starter should smell tangy, yeasty, or like ripe fruit, an overly strong, cheesy, or nail polish remover (acetone) smell indicates an imbalance in the microbial community, often due to over-fermentation or hunger. This usually happens when the starter isn't fed frequently enough. Increase feeding frequency and ensure you're discarding enough old starter before adding fresh flour and water. The acetone smell is often from an excess of acetic acid, which can be remedied by more frequent feedings.
* **Mold:** Any fuzzy, colored spots (green, black, orange, pink) on your starter mean it has become contaminated. Unfortunately, there's no saving a moldy starter. Discard it immediately and thoroughly clean your jar and tools before starting a new one. Mold is different from kahm yeast, which is a white, powdery film that can form but isn't fuzzy. Kahm yeast can sometimes be scraped off, but it's often safer to discard.
**Long-Term Maintenance:**
Once your sourdough starter is active and consistently passing the float test, you have a few options for maintenance:
* **Countertop Maintenance (Active Baking):** If you bake frequently (daily or every other day), you can keep your starter on the counter. Feed it once or twice a day (depending on ambient temperature) using a 1:1:1 ratio (starter:flour:water by weight). For example, keep 50g starter, feed with 50g flour and 50g water. This keeps it vigorous and ready to bake at a moment's notice.
* **Refrigerator Storage (Infrequent Baking):** For those who bake less often (weekly or bi-weekly), storing your starter in the refrigerator is ideal. Feed your starter as usual, let it sit at room temperature for 1-2 hours to kickstart fermentation, then place it in the fridge. In the cold, its metabolism slows down significantly. You'll only need to feed it once a week. The day before you plan to bake, take it out, let it come to room temperature, and feed it 1-2 times until it's active and bubbly again. This 'awakening' process ensures it has enough strength to leaven your bread. Always ensure your starter is well-fed before refrigerating it, as a hungry starter will go dormant poorly. When you retrieve it from the fridge, don't be alarmed by hooch; simply pour it off or stir it in, then proceed with your regular feeding schedule until it's back to full strength. With proper care, your sourdough starter can live for years, becoming a cherished part of your kitchen routine and a continuous source of delicious, homemade bread. Regular observation and adaptation to its needs are key to a thriving, long-lived starter.
