how to make homemade pizza dough easy & delicious
homemade pizza dough

how to make homemade pizza dough easy & delicious

Transform your kitchen into an authentic pizzeria with our simple, foolproof guide to crafting perfect pizza dough from scratch.

Start Baking Now

Key Takeaways

  • ✓ Requires only 4-6 basic ingredients.
  • ✓ Active prep time is under 15 minutes.
  • ✓ Dough can be refrigerated for up to 3 days or frozen for months.
  • ✓ Achieves a superior flavor and texture compared to store-bought options.

How It Works

1
Activate Yeast

Combine warm water, yeast, and a pinch of sugar. Let it sit for 5-10 minutes until foamy, indicating the yeast is active and ready.

2
Mix Ingredients

In a large bowl, combine flour, salt, and the activated yeast mixture. Mix until a shaggy dough forms, then knead briefly until smooth.

3
First Rise (Bulk Fermentation)

Place the dough in an oiled bowl, cover, and let it rise in a warm place for 1-2 hours, or until doubled in size. This develops flavor and texture.

4
Shape & Bake

Gently punch down the risen dough, divide, and shape into your desired pizza crust. Add toppings and bake in a preheated oven until golden and bubbly.

The Magic Behind Easy Homemade Pizza Dough
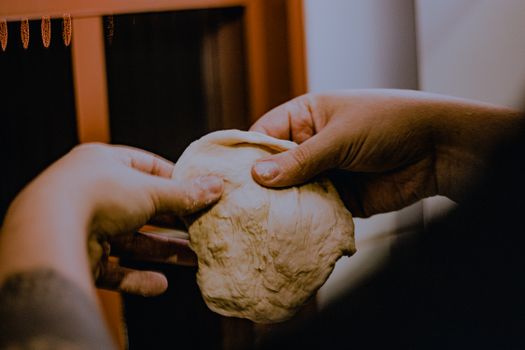
A detailed view of hands kneading dough, showcasing the art of baking indoors. Photo: Marina Utrabo / Pexels
For many, the thought of how to make homemade pizza dough easy seems daunting, a culinary Everest reserved for seasoned bakers. But what if we told you it's not only achievable but incredibly simple, rewarding, and deeply satisfying? The magic truly lies in understanding a few fundamental principles and trusting the process. Forget complicated techniques and obscure ingredients; our approach focuses on simplicity, allowing you to consistently produce a delicious, chewy, and perfectly browned crust that rivals your favorite pizzeria. This isn't just about mixing flour and water; it's about creating a canvas for endless culinary creativity, a foundation upon which countless memorable meals will be built. The beauty of homemade dough is its unparalleled freshness and the ability to control every single ingredient, ensuring a healthier, tastier product free from preservatives and artificial flavors often found in store-bought alternatives. Starting with the right ingredients is paramount, yet surprisingly straightforward. You'll need good quality flour, active dry yeast, warm water, salt, and a touch of olive oil. Each plays a critical role: the flour provides structure, the yeast creates the airy texture, water hydrates, salt enhances flavor and controls yeast activity, and olive oil adds richness and elasticity. We'll delve into the nuances of each, guiding you to select the best options for a superior dough. Understanding the role of yeast, for instance, is key to successful rising. It's a living organism that feeds on sugars and produces carbon dioxide, creating those wonderful air pockets that give pizza its characteristic chewiness. Properly activating your yeast is a crucial first step, ensuring your dough will rise beautifully and achieve the desired texture. This initial activation, often called 'proofing,' is a simple visual check: if your yeast mixture becomes foamy and bubbly, it's alive and ready to work its magic. If it doesn't, your yeast might be old or the water temperature incorrect, signaling a need to start fresh. Mastering this simple step sets the stage for a truly effortless dough-making experience. With this foundational knowledge, you're already well on your way to demystifying the process and realizing just how accessible the art of pizza making truly is. This guide will walk you through each step, making sure you feel confident and excited about your journey to crafting the perfect pizza from scratch. For more baking insights, check out our guide on baking perfect bread at home.

Mastering the Dough: Ingredients and Initial Steps
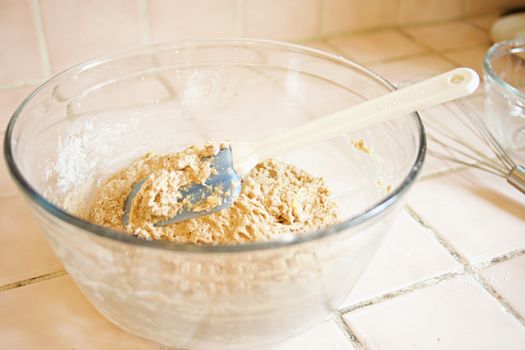
A close-up image of dough being mixed in a glass bowl with a white spatula on a tiled surface. Photo: Rachel Loughman / Pexels
To truly master how to make homemade pizza dough easy, we must first understand the core ingredients and their precise roles, followed by the initial, foundational steps that set the stage for success. Let's break down each component and the technique for combining them effectively. **Flour:** While all-purpose flour works, bread flour is often preferred for pizza dough due to its higher protein content. This higher protein develops more gluten, resulting in a chewier, more elastic crust that can withstand stretching without tearing. If you're aiming for a classic Neapolitan-style pizza, '00' flour is the gold standard, milled to a finer consistency and offering a delicate, airy crumb. However, for an easy, everyday dough, good quality unbleached all-purpose or bread flour will yield excellent results. **Yeast:** Active dry yeast is the most common and easiest to work with for beginners. Instant yeast is another excellent option; it doesn't require pre-proofing and can be mixed directly with the dry ingredients. For this easy recipe, we'll focus on active dry yeast, as seeing it bloom provides reassurance that your dough will rise. The optimal water temperature for activating active dry yeast is between 105°F and 115°F (40°C-46°C). Too cold, and the yeast won't activate; too hot, and you risk killing it. A kitchen thermometer is a small investment that can prevent a lot of frustration here. **Water:** Beyond temperature, the quality of your water matters. Filtered water is always a good choice to avoid any off-flavors from chlorine that might inhibit yeast activity or affect the taste of your final product. **Salt:** Don't underestimate the power of salt. It's not just for flavor; it also strengthens the gluten structure and regulates yeast activity, preventing the dough from over-rising too quickly. Fine sea salt or kosher salt are excellent choices. **Olive Oil:** A good quality extra virgin olive oil adds richness, flavor, and helps tenderize the crust, contributing to a golden-brown finish. **The Initial Mix:** Once your yeast is foamy (indicating it's active), combine your chosen flour and salt in a large mixing bowl. Make a well in the center and pour in the yeast mixture and olive oil. Using a wooden spoon or your hands, gradually incorporate the dry ingredients into the wet until a shaggy, somewhat sticky dough forms. At this stage, resist the urge to add more flour unless the dough is excessively wet. A slightly tacky dough is desirable for a tender crust. This initial mixing is crucial for hydration and beginning the gluten development process. It's a simple, hands-on step that connects you directly to the ingredients, setting the foundation for a truly excellent pizza. The texture at this point might seem a bit rustic, but trust that subsequent steps will transform it into a smooth, pliable dough perfect for stretching.

Kneading, Rising, and Shaping for Pizza Perfection
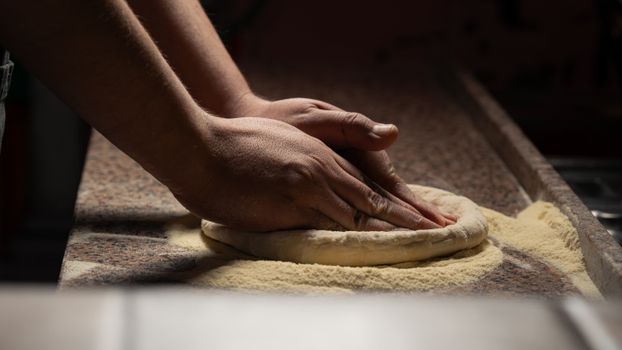
Close-up of hands kneading pizza dough on a floured countertop, indoors. Photo: Willians Huerta / Pexels
The journey of how to make homemade pizza dough easy continues with the transformative stages of kneading, rising, and shaping – each critical for achieving that coveted perfect crust. **Kneading: The Gluten Development Dance:** Once your ingredients are combined into a shaggy mass, it's time to knead. Kneading develops the gluten strands in the flour, which are responsible for the dough's elasticity, strength, and chewiness. For a truly easy experience, you have options: * **By Hand:** Turn the dough out onto a lightly floured surface. Using the heel of your hand, push the dough away from you, then fold it back over itself. Rotate and repeat. This process typically takes 8-10 minutes, or until the dough becomes smooth, elastic, and springs back when gently poked. It's a therapeutic process that builds arm strength and a connection to your food. * **Stand Mixer:** For ultimate ease, a stand mixer with a dough hook is invaluable. Knead on low to medium speed for 5-7 minutes. The dough should gather around the hook and pull cleanly from the sides of the bowl. Regardless of the method, the goal is a smooth, pliable dough that feels alive and resilient. **First Rise (Bulk Fermentation): Flavor and Volume:** After kneading, lightly oil a clean bowl and place your dough in it, turning once to coat. Cover the bowl tightly with plastic wrap or a damp kitchen towel. This creates a warm, humid environment ideal for yeast activity. Place the bowl in a warm spot in your kitchen (e.g., near a sunny window, in a slightly warmed, turned-off oven, or simply at room temperature). The dough needs to rise until it has roughly doubled in size, which usually takes 1-2 hours, depending on your kitchen's temperature. This stage, known as bulk fermentation, is where the yeast works its magic, producing carbon dioxide that inflates the dough and creating complex flavors through enzymatic action. Don't rush it; patience here is rewarded with a more flavorful and digestible crust. **Shaping: From Ball to Base:** Once your dough has doubled, gently punch it down to release the trapped gases. This step is less aggressive than it sounds; a gentle pressing is all that's needed. Divide the dough into portions for individual pizzas (usually two 12-inch pizzas from a standard recipe). Form each portion into a tight ball. For optimal results, let these dough balls rest for another 15-30 minutes, covered, to relax the gluten. This makes them much easier to stretch. To shape, resist the urge to use a rolling pin, which can press out too much air and result in a dense crust. Instead, gently stretch the dough by hand, working from the center outwards, leaving a slightly thicker edge for the crust. You can drape it over your knuckles, rotate it, and let gravity help you, or simply press and stretch on a lightly floured surface. The goal is an even thickness, ready for your favorite pizza toppings. This hands-on process is incredibly satisfying and gives you full control over the final texture and appearance of your crust. With practice, you'll develop a feel for the dough, making shaping an intuitive and enjoyable part of your pizza-making ritual.

Troubleshooting & Advanced Tips for Perfect Pizza Dough
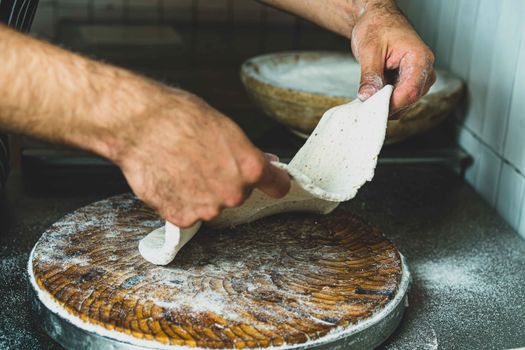
Hands of a chef shaping pizza dough on a wooden board in a kitchen setting. Photo: Anat Landa / Pexels
Even with an easy recipe, understanding potential pitfalls and advanced techniques can elevate your homemade pizza dough from good to truly exceptional. Here are some common troubleshooting scenarios and expert tips to refine your craft: **Common Dough Mistakes & Solutions:** * **Dough Not Rising:** * **Issue:** Yeast is dead or water temperature was wrong. * **Solution:** Ensure water is between 105-115°F (40-46°C) for active dry yeast. Check yeast expiration date. If no foam after 10 minutes, discard and start with fresh yeast. * **Dough is Too Sticky:** * **Issue:** Too much water or not enough flour during initial mixing/kneading. * **Solution:** Gradually add small amounts (1-2 tablespoons) of flour during kneading until it reaches the desired consistency. A slightly tacky dough is good; overly sticky is not. * **Dough is Too Stiff/Hard to Stretch:** * **Issue:** Over-kneading, not enough rest time, or too much flour. * **Solution:** Ensure proper kneading time (8-10 mins hand, 5-7 mins mixer). Allow dough balls to rest at room temperature for at least 15-30 minutes after punching down to relax gluten. * **Crust is Dense/Hard:** * **Issue:** Not enough rise time, too much flour, or rolling pin used too aggressively. * **Solution:** Ensure dough doubles in size during the first rise. Avoid adding excessive flour. Stretch by hand instead of using a rolling pin to preserve air bubbles. **Advanced Tips for Next-Level Dough:** * **Cold Fermentation (Slow Rise):** For deeper flavor, after the initial knead, place the dough (covered) in the refrigerator for 24-72 hours. This slow rise develops more complex flavors and a superior texture. Bring to room temperature for 1-2 hours before shaping. * **High Hydration Dough:** Experiment with slightly increasing the water content (e.g., 65-70% hydration, meaning 65-70g water per 100g flour). This results in a more open, airy crumb, but can be stickier and harder to handle initially. Requires practice. * **Autolyse Method:** Mix just the flour and water, let it rest for 20-30 minutes before adding yeast, salt, and oil. This allows the flour to fully hydrate and gluten to begin developing naturally, leading to a more extensible dough with less kneading. * **Preheat Your Pizza Stone/Steel:** For a truly crispy crust, preheat your pizza stone or steel in the oven for at least 30-60 minutes at the highest temperature your oven can reach (500-550°F / 260-290°C). This provides intense bottom heat, mimicking a brick oven. * **Use a Peel and Semolina/Cornmeal:** Dusting your pizza peel with semolina flour or cornmeal prevents the dough from sticking and helps it slide smoothly onto the hot stone. By understanding these nuances and applying these tips, you'll not only fix common issues but also unlock new levels of flavor and texture, truly mastering the art of how to make homemade pizza dough easy and impressive.

Comparison

FeatureHomemade Dough (Our Recipe)Store-Bought Fresh DoughFrozen Pizza Crust
Flavor ComplexityExcellent, deep yeast flavorGood, but often blandPoor, often cardboard-like
TextureChewy, airy, crispy edgesOften dense or gummyDry, brittle, or overly soft
Ingredient ControlFull control (organic, gluten-free options)Limited control, preservativesMinimal control, many additives
Cost per PizzaLowModerateModerate to High (for quality)
Effort LevelModerate (15 min active)LowVery Low
Time Required2-3 hours (including rise)30 mins (thawing/shaping)15-20 mins (bake only)
Satisfaction

What Readers Say

"I always thought how to make homemade pizza dough easy was a myth, but this guide changed everything! My first attempt was perfect, chewy, and so much better than anything from the store. My family raves about pizza night now."

Sarah J. · Austin, TX

"The instructions were incredibly clear, especially the tips on yeast activation. I've tried other recipes before and failed, but this one made how to make homemade pizza dough easy and enjoyable. The cold ferment tip took it to the next level."

Mark D. · Chicago, IL

"I followed the recipe exactly, and for the first time, I made a pizza crust that was both crispy and fluffy. It yielded two perfect 12-inch pizzas, and the taste was phenomenal. This is now my go-to recipe for how to make homemade pizza dough easy."

Emily R. · Portland, OR

"The dough was fantastic, though it took me a couple of tries to get the shaping just right. The kneading advice for the stand mixer was spot on. Definitely a keeper for how to make homemade pizza dough easy, even for a novice baker like me."

David L. · Denver, CO

"As a busy mom, I appreciate recipes that deliver on their 'easy' promise. This guide for how to make homemade pizza dough easy did just that. I now make a big batch on weekends and freeze it, making weeknight pizza a breeze!"

Jessica M. · Miami, FL

Frequently Asked Questions

What's the best type of flour to use for easy homemade pizza dough?

While all-purpose flour works well, bread flour is often recommended due to its higher protein content, which leads to better gluten development and a chewier, more elastic crust. For a truly authentic Italian-style pizza, '00' flour is ideal for a light, airy texture.

My dough isn't rising; what went wrong?

The most common reasons are inactive yeast or incorrect water temperature. Ensure your active dry yeast is fresh and the water is between 105-115°F (40-46°C). If using instant yeast, ensure it's not expired. A warm, draft-free environment also helps with rising.

How do I store leftover pizza dough?

You can store unused pizza dough balls in an airtight container or a well-oiled, covered bowl in the refrigerator for up to 3 days. For longer storage, freeze individual dough balls wrapped tightly in plastic wrap and then in foil for up to 3 months. Thaw in the refrigerator overnight before use.

Is making homemade pizza dough cheaper than buying it?

Absolutely. The basic ingredients for homemade pizza dough (flour, yeast, water, salt, oil) are very inexpensive. You'll find that making multiple pizzas from scratch costs significantly less than purchasing pre-made doughs or frozen crusts from the store, offering great value.

How does homemade dough compare to store-bought fresh dough?

Homemade dough offers superior flavor, texture, and ingredient control. You can achieve a deeper, more complex yeasty flavor and a perfect balance of chewiness and crispness. Store-bought fresh dough, while convenient, often lacks depth of flavor and can sometimes be dense or gummy.

Who should try making homemade pizza dough?

Anyone who loves pizza and wants a fresher, tastier, and more customizable experience should try making homemade pizza dough. It's especially rewarding for home cooks who enjoy hands-on cooking and want to impress family and friends with authentic, delicious results.

Is it safe to eat pizza dough that hasn't risen properly?

While safe to eat, dough that hasn't risen properly will result in a very dense, flat, and hard crust with poor texture and flavor. It won't be the enjoyable pizza experience you're aiming for, so it's best to troubleshoot and ensure a good rise.

What are the future trends in homemade pizza dough?

Future trends point towards greater experimentation with alternative flours (e.g., whole wheat, sourdough starters for tang, or ancient grains), increased use of long, cold fermentation for enhanced flavor, and a focus on minimalist, high-quality ingredients for pure, authentic tastes.

Ready to transform your pizza nights forever? With this comprehensive guide, you now have all the tools and knowledge on how to make homemade pizza dough easy, delicious, and consistently perfect. Stop settling for mediocre crusts and start crafting culinary masterpieces in your own kitchen today!

Topics: homemade pizza dougheasy pizza recipepizza crust from scratchbest pizza doughpizza dough tutorial
Leo List

IE Escorts NO Escorts US Escorts NZ Escorts AU Escorts
Brampton weed
Adultwork EstrelaBet Vai de Bet R7 Bet Betão Galera Bet Rainbet Bet9ja Shop SportyBet BetKing Sisal Loto Foot Hollywoodbets YesPlay Odibets RushBet Jugabet BetWarrior BetCity MSport betPawa Fortebet